
🚿 Why Install a Schluter Shower System?
When it comes to waterproofing your shower, cutting corners can lead to costly repairs. That’s why homeowners and contractors alike trust the Schluter Shower System—a modern, surface-applied waterproofing solution that’s easy to install and built to last.
In this detailed step-by-step guide, you’ll learn how to install a Schluter shower the right way—from prepping the subfloor to sealing your last seam. Let’s dive in.
🧰 Tools and Materials Checklist
Before you start your install, gather the essential components and tools. We recommend purchasing the Schluter KERDI Shower Kit, which includes many of the items below.
Schluter System Components:
-
KERDI waterproofing membrane
-
KERDI-SHOWER-T prefabricated foam tray
-
KERDI-DRAIN or KERDI-LINE drain assembly
-
KERDI-BAND, inside/outside corners, and pipe seals
-
Optional: KERDI-BOARD, niches, and benches
Required Tools:
-
Unmodified thin-set mortar
-
Notched trowel (1/4" x 3/16" or similar)
-
Utility knife
-
Measuring tape and level
-
Mixing bucket and margin trowel
-
Straight edge and roller
📥 Download your Free Schluter Install Checklist (PDF)
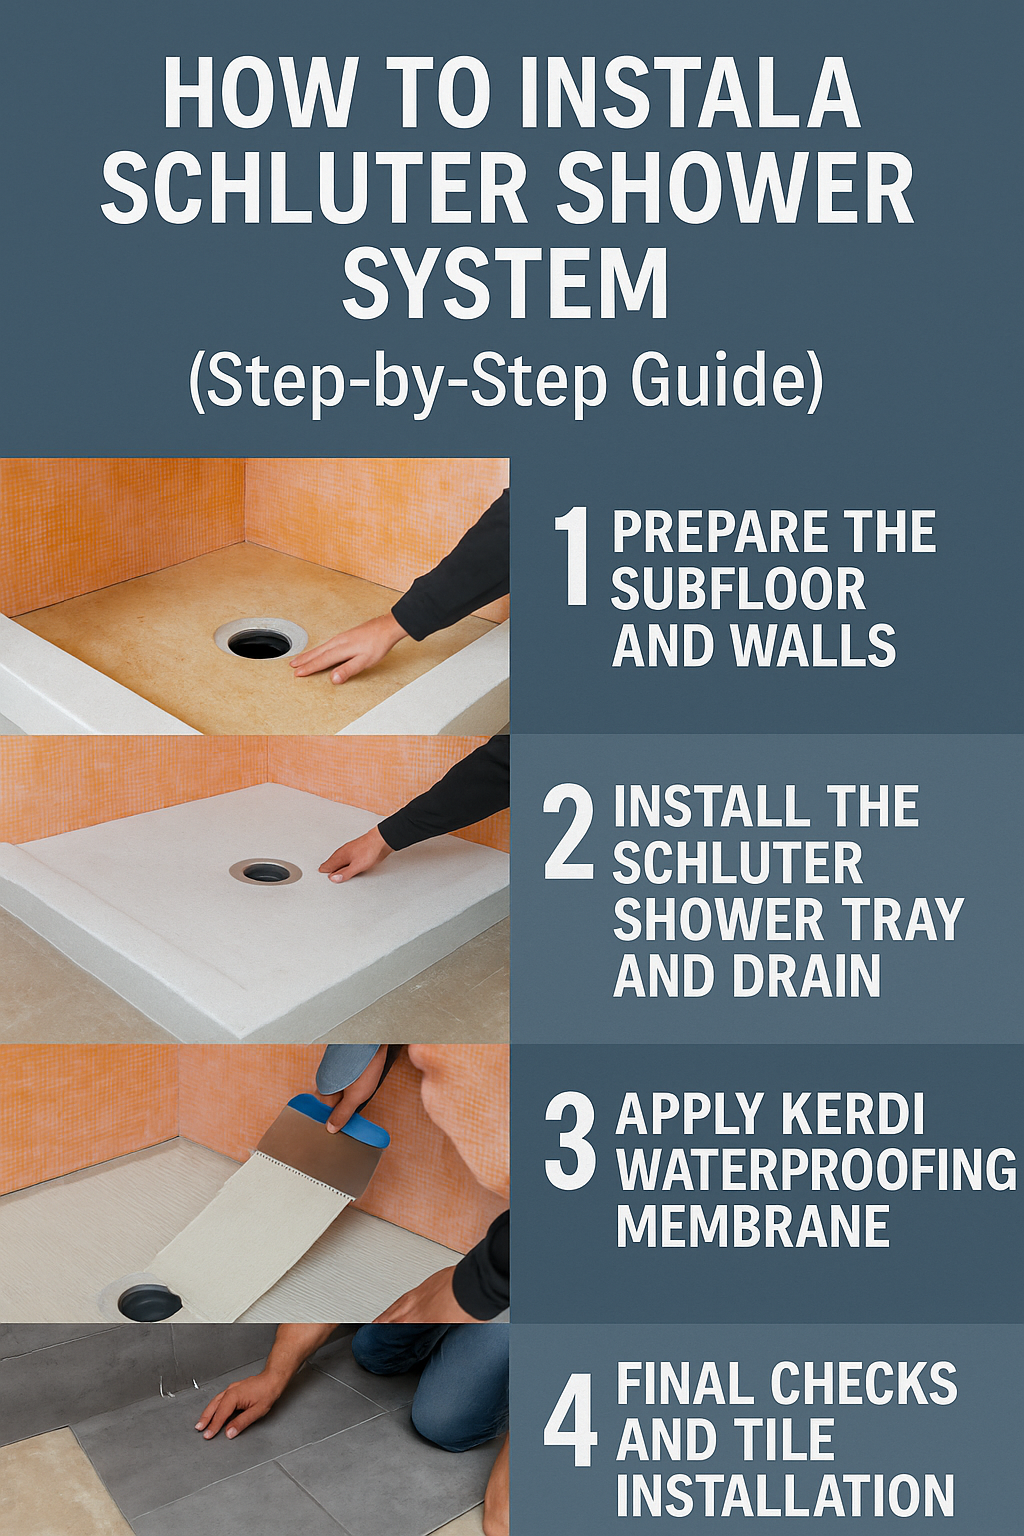
🧱 Step 1: Prepare the Subfloor and Walls
A successful installation starts with proper prep. Make sure your subfloor is level, clean, and solid (plywood or concrete). Mark your drain location before proceeding.
If using drywall or cement board on walls, confirm they are flat and square. Any unevenness will affect waterproofing adhesion and tile layout. Dry-fit the tray and drain before mixing mortar.
🚿 Step 2: Install the Schluter Shower Tray and Drain
-
Dry-Fit First: Lay the tray and ensure proper fit.
-
Mix Mortar: Use unmodified thin-set as per Schluter's specs.
-
Set the Tray: Apply mortar evenly to the subfloor with a notched trowel, then press the tray in place.
-
Install the Drain: Embed the KERDI-DRAIN into mortar, align it with the tray opening, and secure it level with the finished surface.
Tip: Always verify slope to the drain before the mortar sets.
💧 Step 3: Apply KERDI Waterproofing Membrane
Here’s where the waterproofing magic happens.
-
Apply Thin-Set: Spread mortar evenly over wall surface with a notched trowel.
-
Set the Membrane: Press KERDI membrane into mortar with a drywall knife or float.
-
Seal the Seams: Use KERDI-BAND over all seams and corners (overlap 2" minimum).
-
Finish the Details: Apply preformed inside and outside corners and pipe seals for a full water barrier.
🔨 Step 4: Final Checks and Tile Installation
Once the waterproofing is done:
-
Inspect all overlaps and seams
-
Plug the drain and perform a flood test (if required by code)
-
Begin tiling right away—no curing needed
Use tile spacers and level lines to ensure clean, even placement. If you're adding benches, niches, or shelves, now is the time using KERDI-BOARD or pre-made components.
✅ Conclusion: Build a Leak-Proof Shower Like a Pro
Now that you know exactly how to install a Schluter shower, you’re well on your way to building a bathroom that’s as beautiful as it is leak-proof. Whether you’re a confident DIYer or hiring a pro, Schluter offers unmatched reliability and peace of mind.
📥 Download your Free Schluter Install Checklist
📞 Need help? Contact RCPX INC at (888) 973-8339 or visit www.rcpxconstruction.com for professional installation.